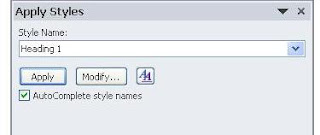
That is "Heading 1"... the Style that we apply to the Chapter Titles in our MS Word document.
(This is what is called in the universal HTML language, "H1". I add that just so you'll know what it is when you see it mentioned.)
We will use Heading 1 (H1) to style each of the main Chapter Titles in our Kindle ebook.
If we want each of our chapters to start on a new page -- as most books do -- we can do that right here.
If we want each of our chapter titles to be in a bigger and/or darker font than our text (of course, we do!), we can do that right here.
If we want each of our chapter titles to start a certain distance down from the top of the page (some do and some don't), we can do that here.
OK... just as we did in previous lessons, let's call the [Display Styles] box (with CTRL-SHIFT-S from Draft or Outline View).
Then, type "Heading 1" into the selection window.
Now, click the [Modify] button.
Now, click [Format] at the bottom left corner of this box to display a list of things we can change:
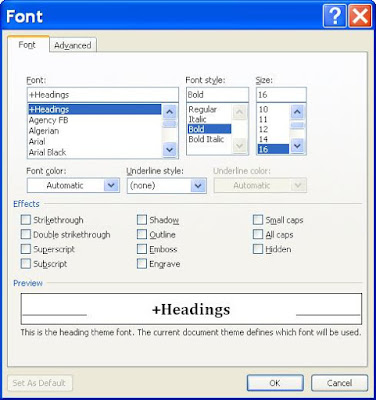
As you see, [Font] is highlighted.
Let's start with [Font].
From this [Font] Selection Box, we see that the default (in MS Word 2010) for Heading 1 is Bold, 16 pts.
Now, I've been saying all along, that we are creating this Kindle Template in order to make our Kindle ebook look exactly as we want it to look.
I must now confess that I was fudging a little there.
We can choose, and Kindle will display, bold, italics and underline text, and it will display smaller and larger size text, but it won't display just any font you might want to use.
The Kindle displays only its own internal font, one that some people think looks like Arial, and others think looks like Times New Roman. Since those two are entirely different fonts, I compromise and say it looks like a cross between them.
The largest size is what appears to be 22 pts in Word. Choose anything larger, and you will still get 22 pts.
(Be aware that Amazon is constantly revising and upgrading, so this will may have changed by the time you read this.)
I am preparing a booklet, about choosing Kindle fonts, that you will be able to display on your own Kindle so you can see exactly what the Kindle will do.
Look for it for sale as an Amazon Kindle eBook sometime around June 15, 2011.
For now, let's accept this default font setting. Remember, you can always come back here to change it later.
Now, go back to the drop down list we displayed above, and choose [Paragraph] to call the [Paragraph] selection box:
Click the [Indents and Spacing] tab to see how Heading 1 is indented and spaced.
Notice (in the [Alignment] window), that it is "Left" aligned.
If you want your Chapter Headings to be centered, instead of "Left aligned", click the arrow at the end of the window and choose "Centered".
In the [Indentations] window, you see that both left nor right indents are " 0 px", and [Special] is "None".
The next group, [Spacing] shows how Heading 1 will be spaced from the top of the page, and how close under it the body text of your book will start.
The spacing shown, 16 px (pixels) before and 4 px below seem pretty small, but I recommend that you leave these spacings as they are for now; you can change them in the final lesson of this series if you decide they are too small.
Now, go to back to the top of this [Paragraph] box, and click the [Line and Page Breaks] tab.
Under the [Pagination] group, find [Page break before], and click it.
This will cause each of our chapters (that we have tagged with Heading 1) to start on its own new page.
This will save you a lot of time, and eliminates the problems caused when you insert manual page breaks between chapters.
This completes the basic items you need for your special Kindle Template.
Next, we will look at tags that you might or might not need for your book... a tag you can use for "block quotes", such as, for example, when you may be quoting from a newspaper, and one just called "Quote", that you might use, for example, for lines of poetry.
Kindle Tips: Create a Kindle Template, Block Quotes Tag, Poetry Quotes Tag, Dialogue Quotes Tag


No comments:
Post a Comment